All sort of Tips & Tricks available for users using Microsoft Windows XP to Windows Vista.Please Rate and Give a comment. Thank You

Thursday, May 28, 2009

Hide Entire Drive from System

Till now you've been trying to hide all your files either using some softwares or using some of the tricks I mentioned in some of my previous posts. Now in this post I am going to tell you how to Hide Your Drives from being shown in my computer. This trick will work only in Microsoft Windows XP. It is a registry trick, so be careful. To do this follow the steps mentioned below:

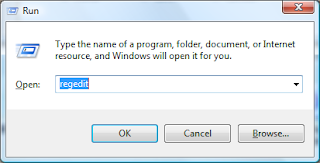
Step 1: Click Start -> Run and type regedit and click on OK (Note: You need to have Administrative Priviledge).


Step 2: Expand in turn to

My Computer -> HKEY_LOCAL_MACHINE -> Software -> Microsoft -> Windows -> CurrentVersion -> Policies -> Explorer

Step 3: Right Click on Explorer and choose New and then DWORD value.


Step 4: Name the new value to NoDrives. Now double click on it to open the properties dialog box.

Step 5: Select Decimal for the Base.

Step 6: Now enter the values shown for the drives below:

A: 1, B: 2, C: 4, D: 8, E: 16, F: 32, G: 64, H: 128, I: 256, J: 512, K: 1024, L: 2048,
M: 4096,
N: 8192, O: 16384, P: 32768, Q: 65536, R: 131072, S: 262144, T: 524288,
U: 1048576,
V: 2097152, W: 4194304, X: 8388608, Y: 16777216, Z: 33554432,
ALL: 67108863,
NO DRIVES: 0(Zero).


For example if you want to hide E drive, just enter the value in the Value Data to be 16 and click on OK.


Note: You won't be able to hide your Drive C if it is the drive where you have installed your XP.


Step 7: Now exit Registry Editor and Restart your system.

Step 8: In order to access your drive just enter the drive letter as d: in the address bar of My Computer and press enter.


Note with this you can also hide multiple drives. To do so continue to the next step...

Step 9: In order to hide two drives for example D: and F: add the corresponding values as
8+32 = 40.

Step 10: Now put that sum in the value field of the NoDrives dialog box.

Step 11: Exit Registry Editor and restart your system.

Note: Do not change any other settings other than the mentioned above else you may not be able to switch on your system.

Thursday, May 21, 2009

Change Text In Start Button

Are you tired of looking at the same old Green Button with Start written on it??? Want to make some changes or want your name to appear on it??? If yes then follow the steps given below. In order to do this you need to have a software named Resource Hacker. This trick works only in Microsoft Windows XP.

Step 1: Goto your Windows directory, which is generally in C:\windows

Step 2: Make a copy of explorer.exe and name it as explorer1.exe

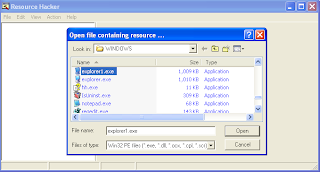
Step 3: Open Resource Hacker and then open this newly created file explorer1.exe


Step 4: Expand String Table -> 37 -> 1033


Step 5: In the right pane you'll see something like 578, "start", now instead of start give Your Name.

Step 6: Click on the Compile Script button and then click on File -> Save then exit


Step 7: Click on Start -> Run -> regedit


Step 8: Expand in turn to My Computer -> HKEY_LOCAL_MACHINE -> SOFTWARE -> Microsoft -> Windows NT -> CurrentVersion -> Winlogon

Step 9: Double click on Shell in the right pane and change the value from explorer.exe to explorer1.exe

Step 10: Exit Registry Editor and reboot your system.

Monday, May 18, 2009

Hide Files in Picture

Everybody wants to hide their files from other. Sometimes you make your files hidden or sometimes you try to password protect them in some .zip or .rar file. You may also tend to use some encryption softwares like Steganos Security Suite. Yes all these things do work but sometimes you may not want others to know that you have hidden something. In my previous post I've talked about making a Folder Hidden. Now I'll tell you how to hide files inside a picture file. The picture file should be a JPEG file i.e., with a .jpg extension. You can even try with other image files but before doing do keep a copy of the original file you want to hide.

Step 1: First copy all the files that you want to hide in a new folder, for example i've used a folder hide


Step 2: Select the files to hide then right click and click on Send to Compressed (zipped) Folder.
Note: You can even use some of the softwares like WinRAR or WinZip or PkZip.


Step 3: Now click on Run and type cmd and press enter


Step 4: Goto to the directory or folder where these files are kept i.e., d:\hide

Step 5: In the command prompt type the given command and press enter
copy /b image.jpg + file1.zip image1.jpg
                         (image where to hide) + (zip file) (new imagename)


Step 6: Once it is done it'll display a message saying 1 file(s) copied. as shown above

Step 7: To ensure whether it was done perfectly or not you can check the size of the new image that is created. It should be equal to the total of the zip file (file1.zip) and the image file (image.jpg).

Now to extract the file you need to have any of the Zip/Rar file opening softwares  like WinRar or WinZip or PkZip. Now to access the hidden files, you've to change the extension of the file from .jpg to .rar or .zip and then double click on it to open it. Then select the files to extract. 
Note: For added security, while compressing the files in Step 2 you can even give password to it.

Saturday, May 9, 2009

Invisible Folder

Want to hide your folder from others using your computer. Then use this trick. It can be used in both Microsoft Windows XP & Vista. The following will show you how to create an Invisible Folder.

Step 1: Make sure the Folder to hide is in Desktop

Step 2: Right Click the folder that you want to hide and select Properties

Step 3: Click on the Customize Tab and then click on the Change Icon button


Step 4: A change icon dialog will be opened, in that select the icon which is blank and click on OK


You will notice that the Icon has now become blank


Step 5: Now Click on Start -> All Programs -> Accessories -> System Tools -> Character Map
Step 6: Select which has no letter appearing on it and then click on Copy button


Step 7: Now Right Click that folder which you are hiding and Click on Rename and press Ctrl + V to paste that blank character and then press Enter

Step 8: Now Right Click on Desktop -> View and Uncheck Auto Arrange.
Step 9: Now you can place the Hidden Icon anywhere on the Screen.

Step 10: This is Optional, after completing Step 9 successfully you can also become more secure by making this folder hidden. Right Click the folder -> Properties and then Check Hidden and Click on OK

Friday, May 8, 2009

Change Aero Look Vista to Basic in One Click

We are all familiar with the transparency also known as the Aero feature in Microsoft Vista. Sometimes we want to disable this feature as it takes a lot of memory. But sometimes the system becomes very slow due to some program and hence we like to switch the interface to basic. In prder to to that either we have to change the theme or we switch off the transparency. To do that we've to to a lot of clicks. But this can be made simple by just tweaking the registry. In order to do that, you have to have the priviledge of Administrator. The steps to do are:

Step 1: Click on Start and in the search type regedit and press enter when it shows regedit.exe


 or click on Start -> All Programs -> Accessories -> Run and type regedit and click on OK.


Step 2: In the User Account Control, click on Continue.

Step 3: Now from the left pane select & expand in turn Computer ->  HKEY_CLASSES_ROOT -> Diretory -> Background -> Shell


Step 4: Right click on Shell and select New -> Key and enter the name as Aero On. Repeat it once more and give the name as Aero Off.

Step 5: Now right click the newly created Key Aero Off and select New -> Key and name it as command.

Step 6: Select command and in the right pane, double click (Default) and enter the value as Rundll32 dwmApi #104 and click on OK.


Step 7: Now once again in the left pane, right click Aero On and select New -> Key and name it as command.

Step 8: Select command and in the right pane, double click (Default) and enter the value as Rundll32 dwmApi #102 and click on OK.


Step 9: Exit Registry Editor.